How to Fill and Sign a Contract PDF in 5 Minutes, No Printer
A real scenario: a client or employer emails you a contract as a PDF and asks you to fill in your details, sign it, and send it back today. Here is how to do the whole thing from your laptop in about five minutes — no printer, no scanner, no app install.
The situation
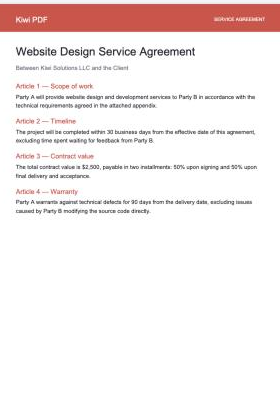
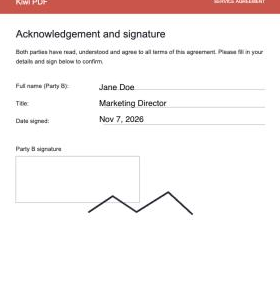
The example below uses a real 2-page Website Design Service Agreement — contract terms on page 1, and an acknowledgement section on page 2 with blank lines for your name, title, date, and a signature box. This is exactly the shape of contract freelancers, employees and clients receive every day: printing it, signing with a pen, then scanning it back in means a trip to a printer you may not even have at home.
Step 1 — Open the contract PDF
Go to the Kiwi PDF web editor and drag the PDF you received by email onto the home screen, or click Choose file from computer. The file stays in your browser — nothing is uploaded anywhere just to open it.
Step 2 — Fill in your details
Switch to the Fill & Sign tab and pick the Text tool. Click on each blank line — full name, title, date — and type directly. The text box snaps right onto the line, the same way you'd write by hand, except it's always legible and you can move or resize it if it lands slightly off.

Step 3 — Sign the contract
Pick the Signature tool. You can draw your signature with the mouse or trackpad, type your name in a handwriting-style font, or upload a photo of your signature — and Kiwi PDF remembers it in your browser so you don't have to redraw it for the next contract. Drag it onto the signature box and resize if needed.
Step 4 — Save and send back
Click Save, then attach the file to your reply email or share it directly from the editor. The filled text and signature are embedded in the PDF itself, so the other party sees exactly what you see — no special software required on their end either.
Tips for signing contracts online
- Save your signature once — it stays in your browser and is ready to drop onto the next contract instantly.
- Resize text boxes to match the line length so your details don't overflow onto the next field.
- Always re-read the filled page before saving — a typo in a date or title is easy to miss once it looks "signed".
Open the editor and sign your own PDF →