Help Center › iPhone & iPad › Getting started
Editor interface tour
A quick look at the toolbar, tool dock, undo and the main controls.
Applies to iOS / iPadOS 16 or later
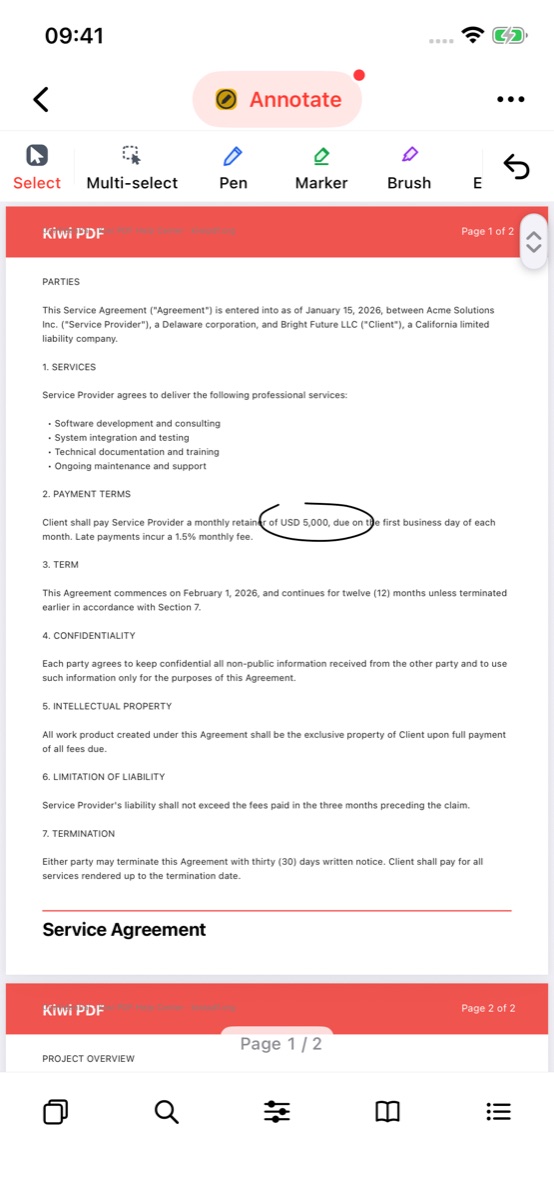
Get familiar with the main parts of the Kiwi PDF editor before you start annotating.
iPhone & iPad
- Back — closes the PDF. Your changes are already saved.
- Tool group — the button in the middle of the top bar shows the current group. Tap it to switch group.
- ••• — share, export, print, password and other file actions.
- Tool dock — the tools of the current group. Swipe it sideways to see more tools.
- Undo — reverses your last change. Redo appears next to it after you undo.
- Bottom bar — Pages, Search, Display options, Reader and Contents.
 123456
The parts of the editor
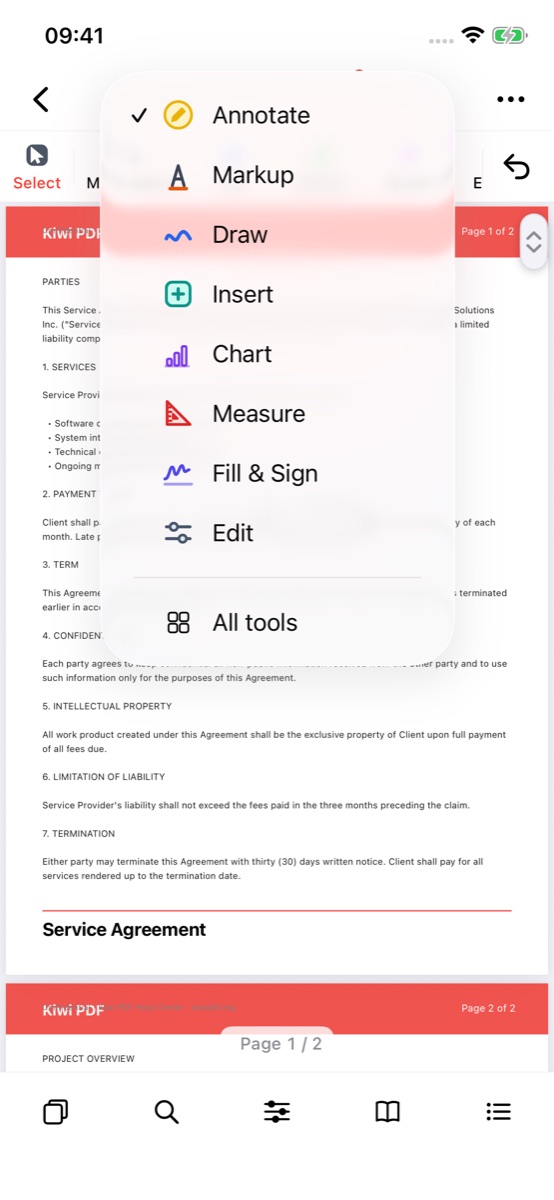
Switch tool group
- Tap the tool group button in the middle of the top bar.
- Pick a group: Annotate, Markup, Draw, Insert, Chart, Measure, Fill & Sign or Edit. All tools opens the Tools hub.
 2
The tool group menu
The Properties bar
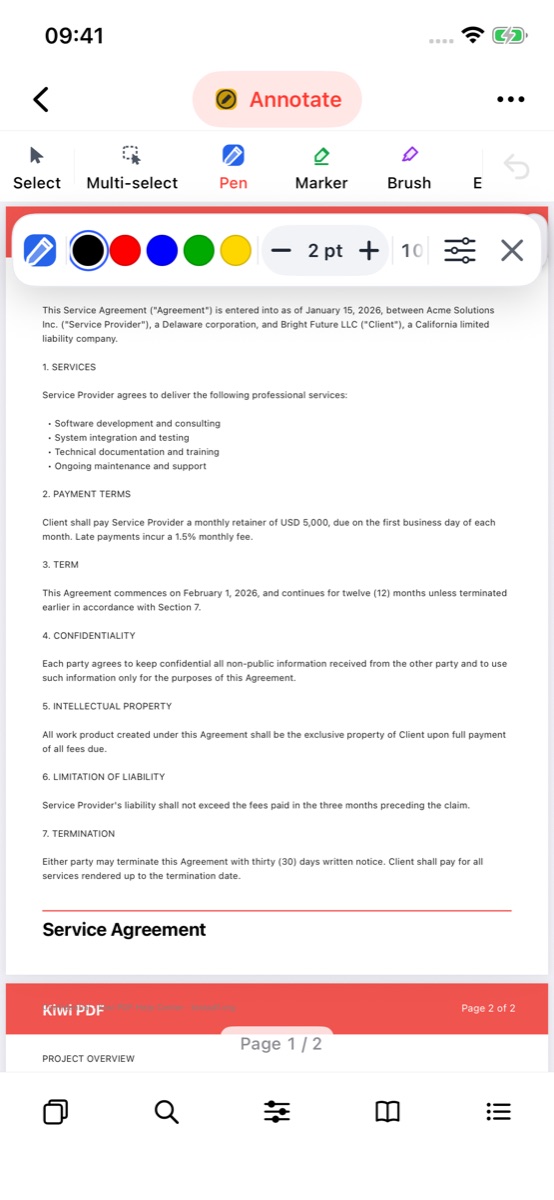
When you pick a tool or select an annotation, the Properties bar floats over the page:
- Tap one of the five colours.
- Use − / + to change the size or thickness.
- Tap for every setting — opacity, line style, font, exact position and more.
- Tap to close the bar and go back to the Select tool.
 1234
The Properties bar for the Pen
Android
Mac
Windows
Web
Undo and autosave
Kiwi PDF saves your changes automatically — you never need to press Save. To reverse a change tap (or click) Undo; to bring it back tap Redo. Undo history is kept for the entire editing session.